
You’re making your morning coffee, and instead of tossing the used grounds in the bin, you wonder could these go in the garden? Specifically, could they help those tomato plants you’ve been nursing along all season?
It’s one of the most common gardening questions I get, and the short answer is: yes, but with conditions.
Coffee grounds add nitrogen to tomato plants when composted first, improve soil drainage in clay-heavy beds, and can deter slugs when sprinkled around stems. Fresh grounds are too acidic and can stunt growth, so always compost them for 2 – 3 months or mix them into soil at a 1:4 ratio with other organic amendments. Used grounds work best as a slow-release nitrogen source during the growing season.
Before we get into the how-to, it helps to understand why coffee grounds affect tomatoes the way they do because once you understand the mechanism, you’ll know exactly when and how to apply them confidently.
Are Coffee Grounds Actually Good for Tomatoes?
This question has a nuanced answer that the internet tends to oversimplify so let’s break it down properly.
The short version: used coffee grounds, applied correctly, are beneficial. Fresh grounds, used incorrectly, can harm.
What Coffee Grounds Contain
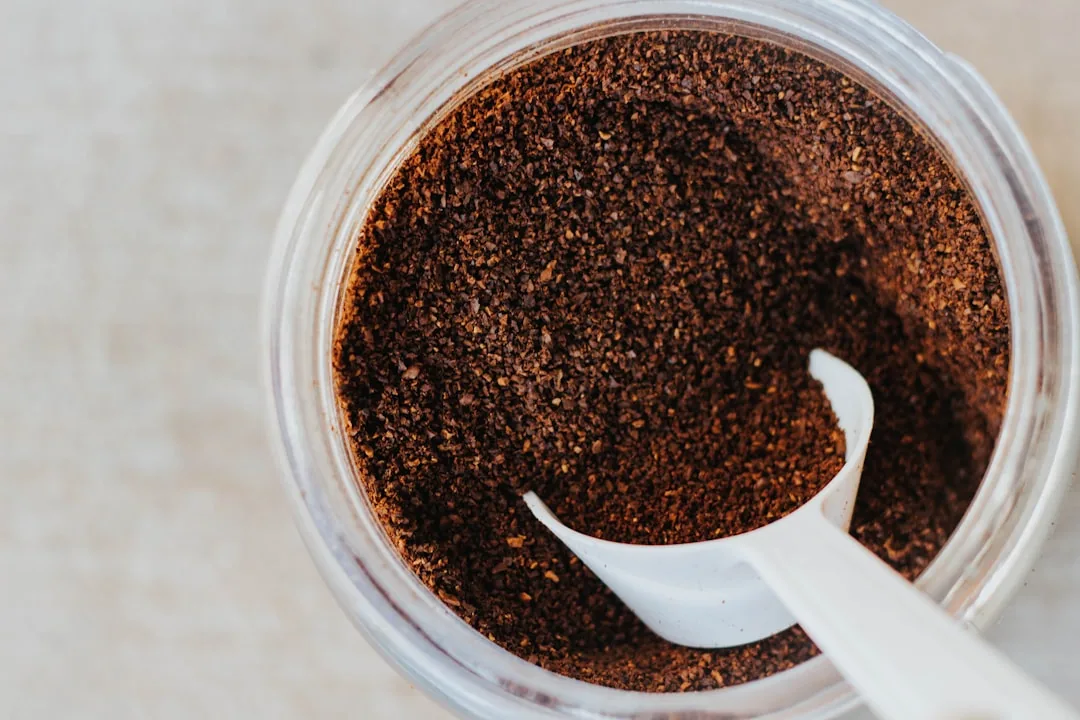
Used coffee grounds are roughly 2% nitrogen by dry weight, along with small amounts of potassium and phosphorus the three nutrients on every fertilizer label. They also contain calcium, magnesium, and copper in trace amounts.
I use Miracle-Gro Soluble fertilizer for this it has worked well in my garden.
This Miracle-Gro Soluble fertilizer has given me some really good results in keeping my plants happy and healthy. It’s great value for money and will last a long time. You can find it by clicking here.
Tomatoes are heavy feeders, particularly for nitrogen during the vegetative stage, so this is a real benefit. The nitrogen in used coffee grounds, however, is not immediately available. It has to be broken down by soil microbes first, making it a slow-release amendment rather than an instant fertilizer.
That distinction matters. Don’t expect a quick green-up like you’d get from a liquid fertilizer. Think of coffee grounds more like a long-game soil builder.
The Acidity Question
Here’s where a lot of gardening advice goes wrong. Many articles claim coffee grounds are highly acidic and therefore perfect for acid-loving tomatoes.
The reality is more complicated. Fresh, unbrewed coffee grounds are acidic, hovering around pH 6.0. But used coffee grounds the ones left over after brewing are actually close to pH neutral (between 6.5 and 6.8), because most of the acidic compounds are extracted into your coffee during brewing.
Tomatoes prefer a soil pH of 6.0 – 6.8, so used grounds are actually a reasonable fit. The risk of acidifying your soil too much with used grounds alone is relatively low.
That said, fresh grounds are a different story. If you’re using unbrewed grounds, the acidity is real and can inhibit germination and stunt young seedlings. Stick to used grounds.
For more on using coffee grounds safely across different plant types, this guide on using coffee grounds on plants covers the broader picture well.
How to Use Coffee Grounds on Tomato Plants
There are three main methods, and each suits a different situation. Pick the one that matches where your plants are in the season.
Method 1: Composting First (Best Overall Approach)
Compost them for 2 – 3 months before applying.
This is the safest, most effective method. Adding coffee grounds to your compost pile allows soil microbes to break them down, neutralise any residual acidity, and begin converting the nitrogen into a plant-available form.
Mix grounds into your compost at a ratio no higher than 2 – 0% of the total volume. Too many grounds can compact the pile and slow decomposition. Aim for a good mix with brown materials like dried leaves or cardboard.
Once composted, work the finished compost into the top 6 – 8 inches of soil before planting, or use it as a top dressing mid-season.
Method 2: Direct Soil Amendment (1:4 Ratio)
Mix used grounds directly into your planting hole or top dressing.
If you’re not composting, blend used grounds into your garden soil or potting mix at a ratio of 1 part grounds to 4 parts soil. This dilution prevents compaction and keeps pH stable.
Work them into the top few inches of soil rather than burying them deep. Coffee grounds are most active near the surface where microbial activity is highest.
Do this at the start of the season when planting out your tomato seedlings, or again mid-season as a topdress around established plants. Avoid piling them in a thick ring around the stem more on that below.
Method 3: Liquid Coffee Ground Fertilizer
Steep grounds in water to make a diluted liquid feed.
Add 2 tablespoons of used coffee grounds to a gallon of water, stir, and let it sit overnight. Strain out the solids and use the liquid to water your tomatoes at the base not as a foliar spray.
This gives you a very diluted, mild nitrogen boost. It won’t replace a balanced fertiliser, but it’s a practical way to use grounds between compost batches.
Apply once a week during the vegetative growth phase, and cut back to every two weeks once fruit sets.
Tip: Pair coffee ground fertilizer with banana peel water for tomatoes to supply both nitrogen and potassium naturally. The two amendments complement each other well nitrogen drives foliage growth, potassium supports fruit development.
How Much Coffee Grounds Should You Use?
Less than you think. This is where most gardeners go wrong.
For a single tomato plant in a raised bed or container, use no more than half a cup of used grounds per application, mixed into the surrounding soil rather than piled on top.
For a standard garden row of 4 – 6 plants, a cup of grounds worked lightly into the soil surface is plenty.
Applied too heavily, coffee grounds form a water-repellent crust on the soil surface that actually blocks moisture from reaching the roots. You’ll think you’re watering thoroughly while the soil underneath stays bone dry.
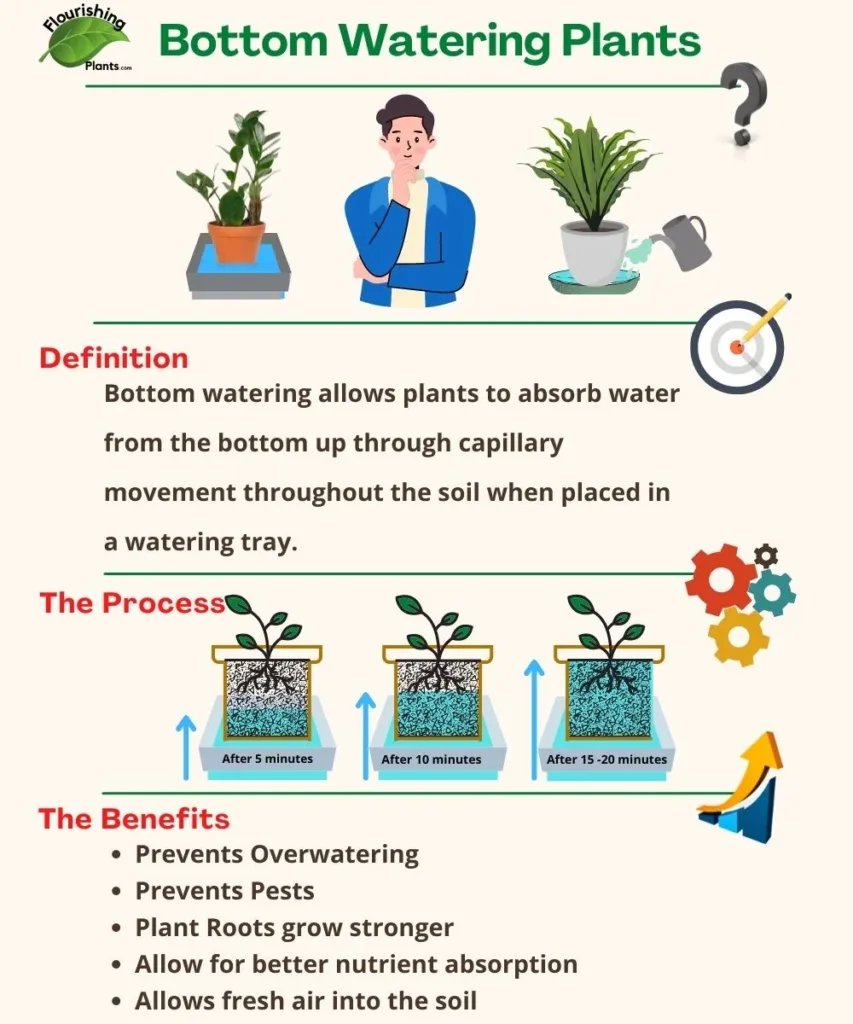
I use Bottom watering plants for this it has worked well in my garden.
What is Bottom Watering?
Bottom watering is done by placing the plant in a tray of water at approximately 1 to 2 inches high. The water is then absorbed into the soil from the bottom up after which it is allowed to drain freely leaving the soil moist and aerated.
Bottom watering :
- Stimulates healthy root growth
- Prevents pests such as gnats
- Prevents overwatering
- Allows fresh air into the soil
If you’re generating a lot of grounds from daily coffee making, the compost bin is genuinely the best place for the excess. They’ll do more good there than in a thick heap around one plant.
Do Coffee Grounds Deter Pests?
This one comes up a lot, and the evidence is mixed but promising for certain pests.
Slugs and snails are the most commonly cited target. The coarse texture of dry coffee grounds is thought to irritate the soft undersides of slugs though research results vary. Sprinkling a thin ring of dry used grounds around each plant is worth trying. Reapply after rain, as wet grounds lose their deterrent texture.
Cats are also reportedly repelled by the smell of coffee grounds. If neighbourhood cats are treating your beds as a litter box, a scattered layer of grounds around the plants may discourage them.
Fungus gnats in container tomatoes are a different story. Coffee grounds do not reliably deter them in fact, damp grounds can attract gnats if they sit wet on the soil surface. For fungus gnat problems in containers, hydrogen peroxide is a more effective tool; the guide on hydrogen peroxide for plants covers the exact dilution ratios to use safely.
Using Coffee Grounds with Tomatoes in Containers
Container-grown tomatoes need slightly different handling.
Potting mix in containers has a limited buffer for pH and nutrient shifts, so don’t amend heavily with coffee grounds. Stick to the 1:4 ratio if mixing directly, and limit applications to once every 3 – 4 weeks.
A liquid steep (the method above) is often the most container-friendly approach it delivers nutrition without altering the soil structure or creating compaction in a small pot.
Also worth noting: container tomatoes are more vulnerable to root problems, including root rot if the soil stays wet. Coffee grounds can compact and hold moisture if overused. If you’re battling root health issues, consider dilute hydrogen peroxide for tomatoes to oxygenate the root zone it’s a surprisingly effective companion treatment.
What Coffee Grounds Won’t Fix
Coffee grounds are often promoted as a cure-all amendment, and it’s worth being realistic about their limits.
They won’t fix nutrient deficiencies mid-season quickly. If your tomato plants are showing signs of nitrogen deficiency (pale green or yellow lower leaves), coffee grounds will help eventually but for a fast correction, a diluted liquid fertilizer will act much faster while the grounds slowly release nitrogen in the background.
They won’t prevent blossom end rot. Blossom end rot is a calcium deficiency issue, and coffee grounds contain very little calcium in a plant-available form. If you’re seeing those dark, sunken patches on the bottom of your tomatoes, that’s a separate problem that needs a targeted fix. This guide on how to stop blossom end rot in tomatoes walks through the exact treatment steps.
They won’t replace balanced fertilization. Tomatoes need a complete nutritional profile across the season. Think of coffee grounds as a useful supplement one piece of a broader feeding approach, not the whole strategy.
Common Mistakes to Avoid
Using fresh, unbrewed grounds. Fresh grounds are significantly more acidic and can inhibit root development and microbial activity. Always use spent grounds from brewing.
Piling grounds in a thick ring around the stem. This creates a compacted, water-repellent layer and can promote mold growth near the base of the plant. Spread thinly and mix in.
Applying during fruit ripening only. The nitrogen in coffee grounds is most useful during the early vegetative growth stage. By the time tomatoes are sizing up and ripening, a high-nitrogen amendment can actually push the plant to keep producing foliage at the expense of fruit.
Using them as the sole fertilizer. Coffee grounds alone will not give tomatoes what they need across a full season. Use them to supplement, not replace, a balanced fertilizing program.
Quick Reference Guide
| Method | How to Apply | When to Use | Frequency |
|---|---|---|---|
| Composted grounds | Work into soil before planting | Spring (at planting) | Once per season as soil prep |
| Direct soil amendment | 1:4 ratio mixed into top soil layer | At planting or mid-season | Every 4 – 6 weeks |
| Liquid steep | 2 tbsp per gallon, watered in at base | Vegetative growth stage | Weekly (fortnightly at fruiting) |
| Pest deterrent ring | Thin dry ring around stem | Slug/snail season | Reapply after rain |
Frequently Asked Questions
Can I use coffee grounds every day on my tomatoes?
No daily application would over-acidify the soil and risk compaction. Once every 3 – 4 weeks for direct application is plenty. If you’re using the liquid steep method, once a week during active growth is the maximum.
Do coffee grounds make tomatoes grow faster?
Not directly. They release nitrogen slowly over weeks, which supports steady vegetative growth. Don’t expect a dramatic speed boost think of them as a slow-burn supplement rather than a growth accelerator.
Can coffee grounds replace commercial fertilizer for tomatoes?
Not entirely. Coffee grounds contribute nitrogen but are low in phosphorus and calcium both critical for tomato fruit development. Use them as one part of a broader feeding approach.
How do I know if I’ve used too many coffee grounds?
Watch for yellowing leaves (nitrogen toxicity can paradoxically cause this at high concentrations), a crusty or mold-covered soil surface, or water pooling rather than absorbing. If you see any of these, hold off on grounds for the rest of the season.
Should I use coffee grounds at the start of the season or mid-season?
Both, ideally. Work composted grounds into the soil before planting for a slow-release nitrogen base, then use the liquid steep method mid-season to top up during the vegetative growth stage.
The Bottom Line
Coffee grounds are a genuinely useful, free soil amendment for tomato plants but only when you use them correctly. Composted or diluted, they supply slow-release nitrogen, support soil biology, and can help deter slugs naturally.
The key is moderation and method. Stick to used grounds, keep applications light and infrequent, and always mix rather than pile. Combined with balanced fertilization and good watering practice, coffee grounds are a worthwhile addition to your tomato-growing toolkit.
Used coffee grounds, applied at a 1:4 ratio or composted first, are a safe and effective slow-release nitrogen supplement for tomatoes just don’t use fresh grounds, don’t over-apply, and pair them with a balanced feeding program for the best results.
Related Posts
- Using Coffee Grounds on Plants
- Banana Peel Water for Tomatoes
- Hydrogen Peroxide for Tomatoes
- How to Stop Blossom End Rot in Tomatoes
- Using Coffee Grounds on Succulents
- Tomatoes Staying Green Inside What It Means
Related Articles
Pepper leaves curling? Learn the 7 most common causes — from underwatering and heat stress to aphids and viral disease — plus step-by-step fixes to help your plants recover fast.
Pepper Leaves Turning Yellow: Why It Happens and How to Fix It
Pepper plant leaves turning yellow? Learn the 7 most common causes — from nitrogen deficiency to overwatering — and get specific, actionable fixes to bring your pepper plants back to health.