
Often, the secret to lush, green leaves and bumper harvests is sitting right in your bathroom cabinet. I am talking about Epsom salt, a simple, budget-friendly household staple that home gardeners have relied on for generations to work wonders on their soil.
Using Epsom salt on plants is a highly effective, natural way to correct magnesium and sulfur deficiencies, resulting in greener foliage, more abundant blooms, sweeter fruits, and stronger root systems. The standard mixing ratio for a foliar spray is 1 tablespoon of Epsom salt per gallon of water, while a soil drench requires 1 to 2 tablespoons per gallon.
While it is not a complete fertilizer, it works beautifully alongside your regular feeding routine to help plants absorb nutrients more efficiently, giving you a flourishing garden without the high cost.
But before you start sprinkling this white, crystalline powder all over your garden beds, it is important to understand how and why it works. Applying it incorrectly or using too much can do more harm than good, so let’s break down the science in plain language first.
Why Does Epsom Salt Work on Plants?
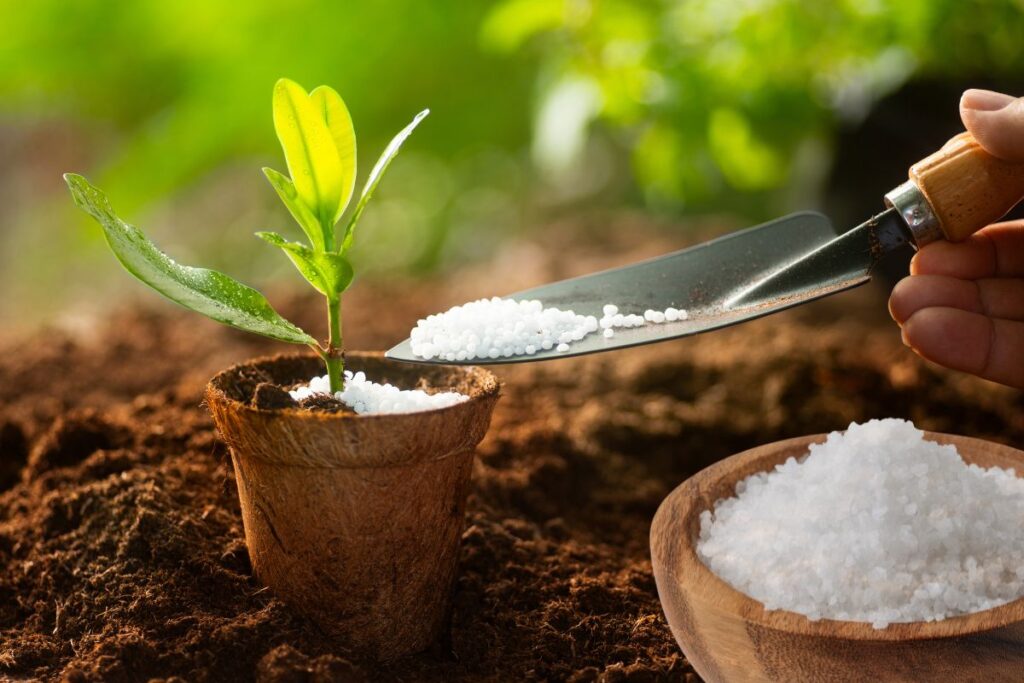
Despite its name, Epsom salt isn’t actually salt at all. It is a naturally occurring mineral compound known as magnesium sulfate ($MgSO_4 cdot 7H_2O$).
Unlike table salt (sodium chloride), which can be highly toxic to vegetation, magnesium sulfate contains two vital nutrients that plants absolutely crave: magnesium and sulfur.
Magnesium is the powerhouse behind chlorophyll production. It is the central atom in the chlorophyll molecule, which is what makes leaves green and allows plants to convert sunlight into energy through photosynthesis.
Without enough magnesium, your plants will look pale, grow slowly, and struggle to produce flowers or fruit.
Sulfur, on the other hand, works behind the scenes to help plants produce essential enzymes, amino acids, and vitamins. It also helps plants absorb other key nutrients from the soil, such as nitrogen and phosphorus.
Because Epsom salt is highly soluble in water, plants can absorb these minerals almost instantly through their roots or directly through their leaves.
Reassure yourself that unlike harsh synthetic chemicals, Epsom salt is highly gentle and won’t build up in the soil or burn your plants when used in the correct ratios.
If you’ve ever experimented with other household remedies, like using vinegar on plants to manage weeds or clean garden tools, you know that finding the exact balance is key to keeping your garden happy and healthy.
9 Ways to Use Epsom Salt on Your Plants
Let’s look at the most effective ways you can use this simple mineral in your garden, along with the exact mixing ratios and step-by-step instructions for each.
1. Boosting Tomato and Pepper Yields
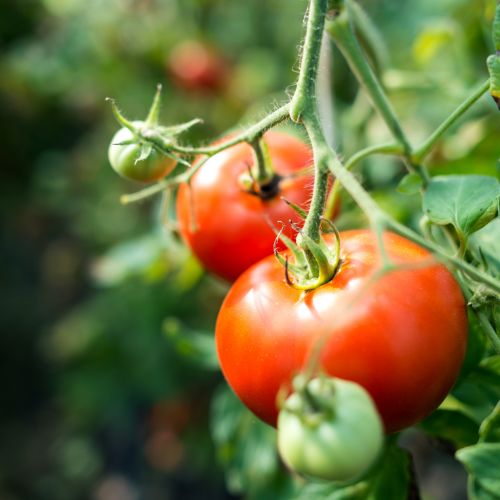
Tomatoes and peppers are heavy feeders that crave magnesium, especially when they start flowering and setting fruit. A lack of magnesium can lead to smaller harvests, weaker fruit, and pale, yellowing leaves.
What it does: Increases fruit production, prevents blossom end rot by helping calcium uptake indirectly, and prevents yellowing between leaf veins.
Why it works: Magnesium is critical for seed germination and fruit development in nightshade plants, helping them channel energy into producing larger, juicier crops.
How to apply:
- Mix 1 tablespoon of Epsom salt into 1 gallon of lukewarm water until completely dissolved.
- Pour the solution directly onto the soil at the base of your tomato or pepper plants.
- Apply this soil drench once every 2 weeks starting when the first blossoms appear.
- For an extra boost, spray the leaves with a half-strength mixture (1.5 teaspoons per gallon) once a month.
2. Curing Yellowing Leaves (Magnesium Deficiency)

If your plant leaves are turning yellow but the veins remain dark green, you are likely looking at interveinal chlorosis, a classic sign of magnesium deficiency.
What it does: Restores the bright green color to pale foliage by kickstarting chlorophyll production.
Why it works: Because Epsom salt is highly soluble, a foliar spray delivers magnesium directly to the leaf cells where it is needed most, bypassing the root system for faster results.
How to apply:
- Fill a clean spray bottle with 1 gallon of water and add 1 tablespoon of Epsom salt.
- Shake the bottle well until the crystals are entirely dissolved.
- Spray the foliage thoroughly, focusing on the undersides of the leaves where absorption is highest.
- Apply this foliar spray early in the morning or late in the evening every 1 – 0 days until the leaves regain their rich green color.
3. Improving Seed Germination Rates

Starting seeds indoors or directly in the ground can be a gamble, but Epsom salt gives tiny seeds a much-needed head start.
What it does: Strengthens cell walls, boosts energy levels in the seed, and encourages a robust, healthy root system right from the start.
Why it works: Sulfur and magnesium aid in the absorption of key nutrients and help the seed coat break down more easily, leading to faster sprout times.
How to apply:
- Before planting, sprinkle 1 tablespoon of dry Epsom salt directly into the bottom of each planting hole or furrow.
- Cover the salt with a thin, 1/4-inch layer of soil so the seeds do not touch the crystals directly.
- Plant your seeds as normal and water them thoroughly with plain water to dissolve the salt.
- Alternatively, soak your seeds in a solution of 1 teaspoon of Epsom salt per 1 gallon of water for 1 – 2 hours before planting.
4. Overcoming Transplant Shock
Moving a plant from a small plastic pot into a garden bed or a larger container is a stressful process that can cause wilting, leaf drop, and stunted growth.
What it does: Calms the plant’s root system, prevents shock, and helps the plant adapt quickly to its new soil environment.
Why it works: It aids in chlorophyll production and root regeneration, allowing the plant to absorb water and nutrients immediately after being moved.
How to apply:
- Dissolve 1 tablespoon of Epsom salt in 1 gallon of water.
- Gently remove your plant from its old pot and place it into the newly dug hole.
- Water the soil around the newly transplanted plant with the Epsom salt solution immediately after planting.
- Repeat this root-drenching process once more, exactly 7 days later, to ensure the plant establishes itself beautifully.
5. Enhancing Flower Blooming (Roses and Flowering Shrubs)
Every rose gardener dreams of massive, fragrant blooms that last for weeks, and Epsom salt is the secret weapon to make that happen.
What it does: Encourages the plant to produce more basal breaks (new canes from the base), resulting in bushier plants and larger, more vibrant flowers.
Why it works: Magnesium stimulates chlorophyll production, which provides the extra energy required to produce abundant blooms.
How to apply:
- At the start of the spring growing season, sprinkle 1/2 cup of dry Epsom salt around the base of each rose bush.
- Work the crystals gently into the top inch of soil using a hand rake, being careful not to disturb the roots.
- Water the area thoroughly to help the minerals seep down to the root zone.
- Throughout the blooming season, apply a foliar spray made of 1 tablespoon of Epsom salt per gallon of water once every 4 weeks.
6. Sweetening Fruit Flavor (Citrus and Berries)

If your home-grown lemons, strawberries, or blueberries taste a bit sour or bland, a quick mineral boost can sweeten them up naturally.
What it does: Boosts the sugar levels within the fruit, making your harvest noticeably sweeter and more flavorful.
Why it works: Magnesium increases the plant’s ability to undergo photosynthesis, which produces the natural sugars and carbohydrates that sweeten the fruit.
How to apply:
- Dissolve 2 tablespoons of Epsom salt in 1 gallon of water.
- Apply this mixture as a soil drench around the drip line of your fruit trees or berry bushes.
- Apply this treatment three times a year: once in early spring, once when the blossoms fall, and once when the fruit begins to form.
- For small potted berries, reduce the ratio to 1 tablespoon per gallon of water.
7. Greening Up Your Lawn
A yellowing, patchy lawn can ruin the look of an otherwise beautiful garden, but you don’t need harsh chemical lawn foods to fix it.
What it does: Restores a deep, rich green color to dull grass and encourages stronger root growth to help the lawn survive hot summer days.
Why it works: Grass requires a high amount of magnesium to maintain its green pigment and stay healthy under constant foot traffic.
How to apply:
- Measure out 3 pounds of
- Mix the salt into water using a pull-behind or handheld tank sprayer, or dilute it into your garden hose sprayer attachment.
- Apply the spray evenly across the grass in early spring when new growth begins, and repeat once more in early autumn.
- If you prefer dry application, mix the crystals evenly with standard lawn fertilizer or sand, broadcast it with a spreader, and water the grass deeply immediately after.
8. Helping Houseplants Thrive
Potted indoor plants have a limited amount of soil, which means they can quickly deplete all the natural nutrients available to them.
What it does: Prevents indoor plants from becoming root-bound and stagnant, keeps their foliage a deep glossy green, and helps them maximize low indoor light.
Why it works: Because potted plants are watered frequently, vital minerals like magnesium wash out of the drainage holes over time. A mild Epsom salt solution replenishes these lost nutrients safely.
How to apply:
- Dissolve 1 teaspoon of Epsom salt into 1 gallon of room-temperature water.
- Use this solution to water your houseplants during their regular watering schedule.
- Apply this gentle mineral feeding once a month during the active spring and summer growing seasons.
- For heavy foliage plants like ferns, philodendrons, and monsteras, use this mixture as a light leaf mist instead.
9. Removing Stubborn Tree Stumps
If you have an old tree stump in your yard that you don’t want to pay hundreds of dollars to grind down, Epsom salt can help you remove it completely for pennies.
What it does: Safely kills the remaining root system and accelerates the natural wood decomposition process without introducing harsh toxic chemicals into your yard.
Why it works: In massive quantities, magnesium sulfate acts as a powerful dehydrator. It sucks all the vital moisture directly out of the wood tissue, causing it to die back and rot away much faster.
How to apply:
- Use a power drill with a large, 1/2-inch drill bit to bore several deep holes (at least 8 to 1 – 2 inches deep) into the top and sides of the stump.
- Pour 100% dry Epsom salt directly into each hole until they are filled to the top.
- Add just enough water to each hole to moisten the salt, but do not wash it out.
- Cover the top of the stump with a dark plastic tarp or trash bag to protect it from rain and keep it hidden from the sun. Repeat this filling process every 3 to 4 weeks until the wood becomes brittle, porous, and easy to chop away.
When NOT to Use Epsom Salt in Your Garden
While magnesium sulfate can do wonders for your garden, it is not a magical cure-all for every planting problem. Using it carelessly when your garden doesn’t need it can lead to nutrient toxicities and severely damaged crops.
Before you apply a single drop of Epsom salt, keep these critical safety rules in mind:
- Test Your Soil First: If your soil already has high magnesium levels, adding more can block your plants from absorbing calcium, leading to severe structural problems like blossom end rot in tomatoes.
- Avoid Using on Sage, Orchids, and Succulents: Desert plants, specific herbs, and epiphytes (like orchids) have evolved to thrive in lean, mineral-poor conditions. Epsom salt can easily overwhelm their delicate systems.
- Never Apply in Direct Sunlight: Spraying foliage in the heat of the midday sun can magnify the light rays and cause severe leaf scorch. Always apply foliar sprays early in the morning or late in the evening.
Quick Reference: Epsom Salt Mixing Ratios
| Garden Application | Epsom Salt Amount | Water Amount | Frequency |
|---|---|---|---|
| Tomatoes & Peppers | 1 tablespoon | 1 gallon | Every 2 weeks |
| Foliar Deficiencies | 1 tablespoon | 1 gallon | Every 1 – 0 days |
| Seed Germination | 1 tablespoon (dry) | Per planting hole | Once at planting |
| Transplant Shock | 1 tablespoon | 1 gallon | At planting & 7 days later |
| Roses & Shrubs | 1/2 cup (dry) | Spread around base | Once in early spring |
| Fruit & Berries | 2 tablespoons | 1 gallon | 3 times per year |
| Lawns & Turf | 3 pounds (dry) | Per 1,250 sq. ft. | Spring and Autumn |
| Houseplants | 1 teaspoon | 1 gallon | Once a month |
Bring Your Garden Back to Life Safely
Gardening is all about working in harmony with nature. By utilizing a simple, time-tested home remedy like Epsom salt, you can unlock your soil’s hidden potential, green up pale foliage, and enjoy a vibrant, blooming backyard without breaking the bank. Just remember to start small, mix accurately using the chart above, and listen to what your plants are telling you!
Related Articles
Pepper leaves curling? Learn the 7 most common causes — from underwatering and heat stress to aphids and viral disease — plus step-by-step fixes to help your plants recover fast.
Pepper Leaves Turning Yellow: Why It Happens and How to Fix It
Pepper plant leaves turning yellow? Learn the 7 most common causes — from nitrogen deficiency to overwatering — and get specific, actionable fixes to bring your pepper plants back to health.